CSS is a language that we use to style HTML elements in the way we want. Modern web design is only possible because of CSS.
Before CSS was made, the website looked ugly with just some HTML elements here and there.
In WordPress, you can do a lot without any knowledge of web designing.
But if you want to style elements in your blog post and pages in the way you want, you will have to use CSS.
In WordPress, you have an option to add custom CSS.
Today in this article, I will show you how you can add custom CSS to your WordPress website.
You can do it in more than one way. I will share all those and some CSS codes that you can use to style your images in your blog post.
I will show you how you can add different styles to elements in your blog post, just by calling a CSS class.
So let’s get started.
How to add custom CSS in WordPress?
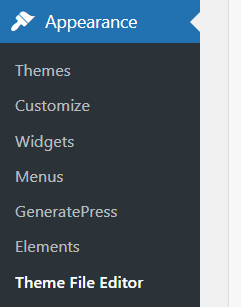
To add custom CSS to your WordPress website, go to Appearance>Theme file editor.
Here you can see it as shown in the image below. There you can write your CSS code.
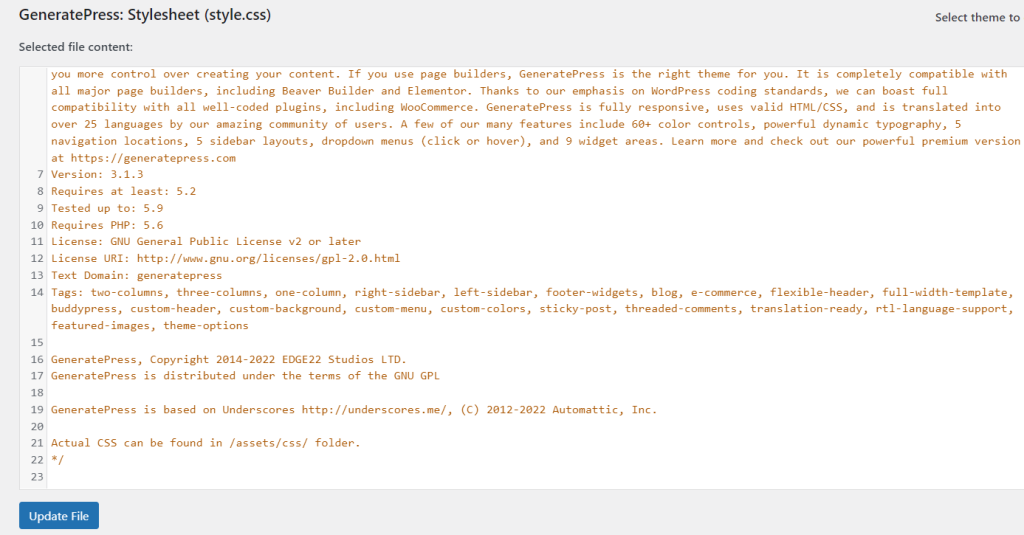
But if a WordPress update is released and when you update it, chances are code there will be removed.
So we have two methods to add custom CSS to WordPress.
Method 1: Using the Built-in CSS editor
1. The first step is to go to “Appearance” in your WordPress dashboard. Then click on “Customize”.
Here you can customize your template like changing the font, sidebars, categories, etc…
When you click on “Customize” you will see a page just like the image shown below.

2. Here click on ‘Additional CSS’. Then you can see a code editor like the image shown below.
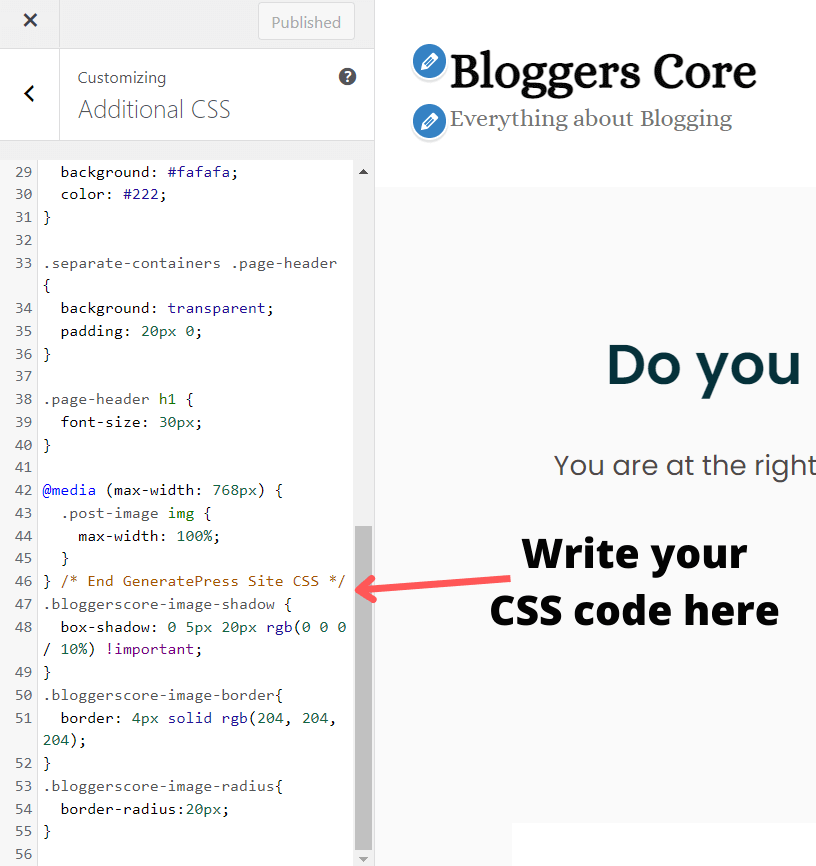
3. You can write your CSS code here. Write your CSS code under the template code.
Method 2: Using a WordPress Plugin
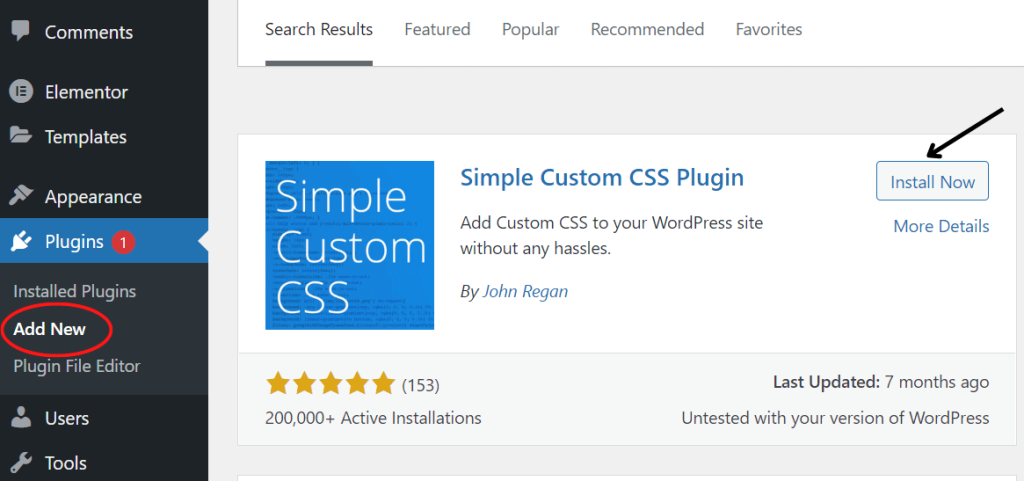
1. First, in your WordPress dashboard go to ‘Plugins’, and then click on ‘Add new’.
2. Then search for WordPress plugin ‘Simple custom CSS‘. Install the plugin and activate it.
3. Then go to ‘Appearance’ and you will see an option called ‘Custom CSS’. Click on it.
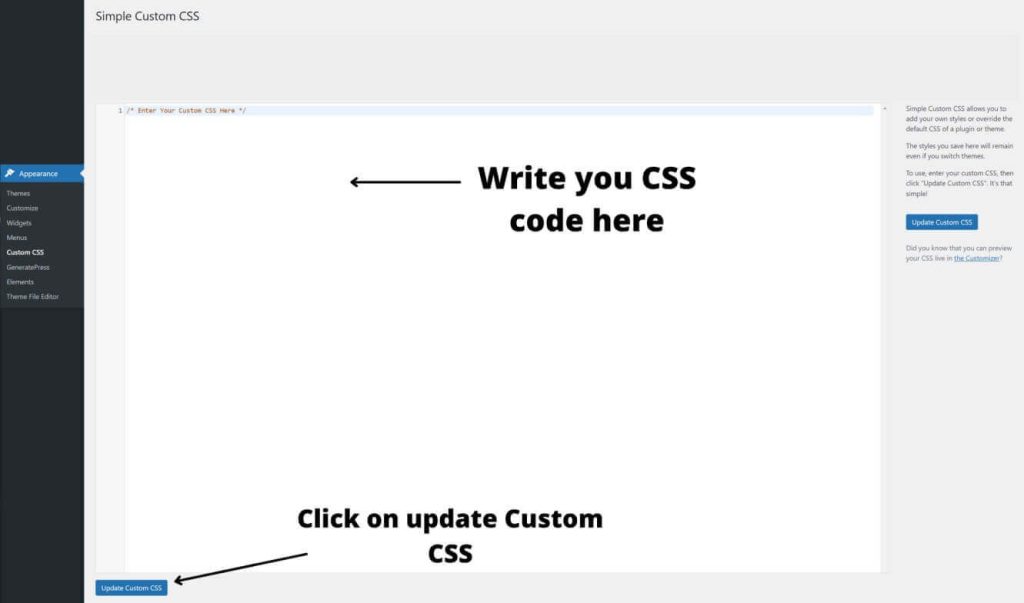
4. Now you will see the Simple Custom CSS plugin dashboard. Here you can write your CSS code. This is another way to add CSS code to your WordPress.
I would recommend using the build-in CSS editor because installing an additional plugin for it would make your website load slower.
How to add custom CSS styles to elements in WordPress blog posts?
For this first, you need to either use the built-in CSS editor or the simple custom CSS plugin. The steps are the same for both. We will be using the built-in CSS editor.
1. First go to Appearance>Customize>Additional CSS. Now we need to write the CSS code.
For example, first, we can look at how we can add an image box shadow.
2. Create a class. Make sure you create a unique class name. This means creating a class name that is not already in use in the template. If the class name is in use, our code will mess up the code in it. Create a class name like the image shown below.
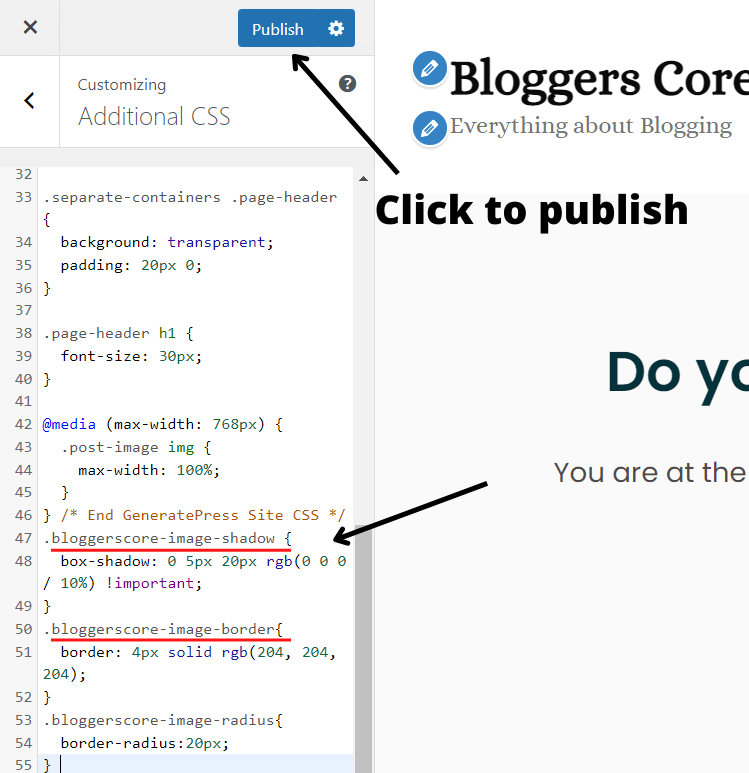
3. The image above shows the code for image box-shadow, increasing border radius, and adding border for the image. You can do these not just for images but for any other elements in your blog post. The first step is always creating the class and writing the CSS code. Publish the code.
4. Now we need to add this class to our image so that the design will appear on the image.
For that, edit the post you want to design. Click on the image you want this design to appear. In the right sidebar, click on Advanced.
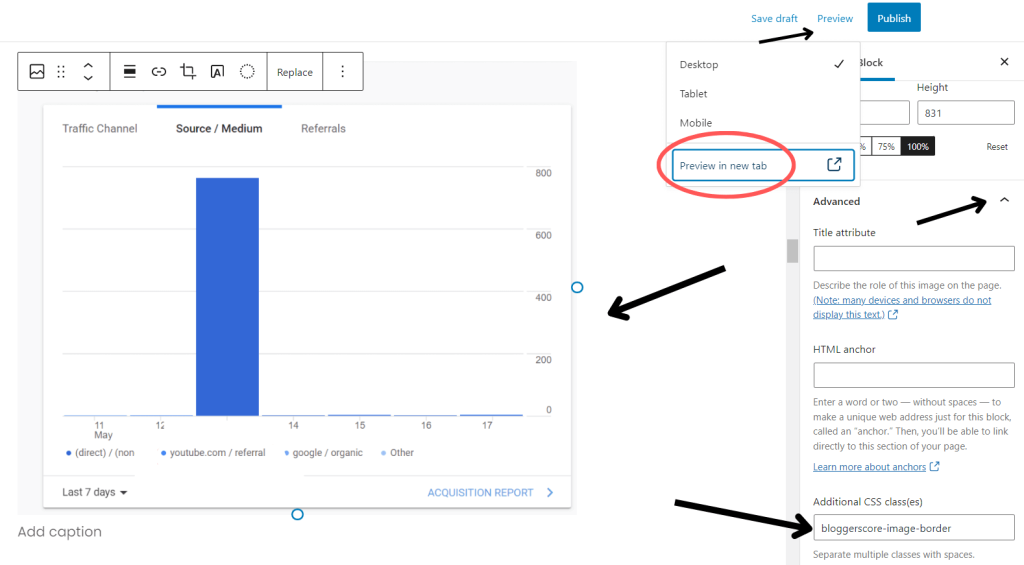
Now you will see HTML anchor and Additional CSS classes option. Under the ‘Additional CSS class, type the class name that you created.
if you want the image to have a border, then add the class containing the code for the border. Then preview your page. You will see that the border effect is added to your image.

You can add any kind of design to any elements on your blog post by creating a class and adding it as shown above.
If you want to add a design to a particular element in all of your website, let’s say you want to add a certain color to text that contains links, then you can say code something like this.
a{
   color:violet;
}
This will add color to all tags on your website (ie . links).
Code for increasing image border-radius
.bloggerscore-image-radius{
	border-radius:20px;
}
Code for image box-shadow
.bloggerscore-image-shadow {
  box-shadow: 0 5px 20px rgb(0 0 0 / 10%) !important;
}
Code for image border
.bloggerscore-image-border{
	border: 4px solid rgb(204, 204, 204);
}
Also read:
How to make money online as a teenager ?
12 Tips to make your website appear in google instantly
How to write a perfect blog post as a beginner ?
Conclusion
So I hope you understood how you can add custom CSS styles to your elements in WordPress. If you want to learn CSS for designing your website, here’s a helpful website. learn CSS.
You can learn some CSS styling from W3schools and add different designs to elements in your website. If you have any queries, feel free to ask in the comments. I will respond to all.
If you want us to design or build you a website, contact us mail [email protected]