HTML is the standard Markup language for web pages. All web pages are created in HTML. The language is easy to learn and very user-friendly. Some of these HTML tags play an important role in search engine optimization. If you are creating your own custom HTML template, you should be using these tags. Today in this article I will share 10 HTML tags that you should add to your custom template for SEO.
I will provide a complete list of HTML tags that will help you with the SEO of your web page. Add these tags to your HTML template for better results.
Without further do, let’s jump into the article.
10 HTML tags for SEO
1. Title tag
Your title tag is the most important part of the blog post. This appears as a title in google search results. The blog post title is the main thing that defines what your article is about in the first look. If a user sees your website link on the SERP with other websites, the title is the thing that makes the user either click your link or the others. Users should be able to understand what your article is about so that they can decide whether to click or not. Your post title helps users to understand whether it is the information that they are looking for. So if your title doesn’t describe your content well, people won’t click through your link.
In HTML, the title tag is written as follows.

This HTML tag shown above in the image is known as the title tag. In WordPress and other platforms, you can add titles to your post easily. While creating your own template, you will have to add it like this. Also, remember to add the title in the H1 tag inside your post for the users to see.
2. Meta tag
The meta tags are the next important HTML tag that you need to add while creating an SEO-friendly template. In meta tags, we provide metadata for search engines as well as for the users.
Well, what is metadata?
Metadata provides data about other data or content. In the blogging or website context, metadata provides what the content of the page/website is about.
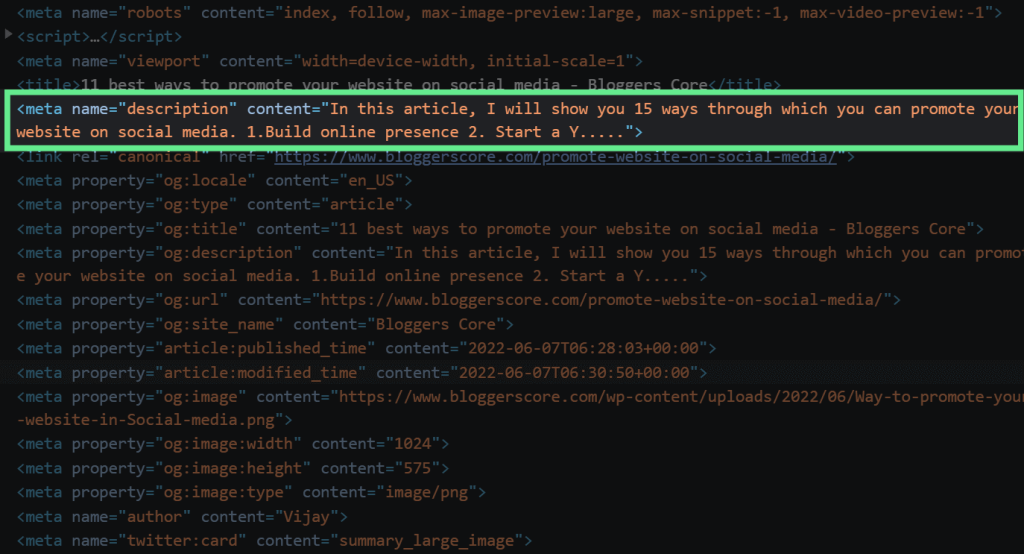
You can give keywords of the page, description, viewport settings, authors name, characters set, and robots settings inside the meta tags. Information you give in all these meta tags won’t be displayed on the page but it is machine parseable. It is mainly a description or instruction for search engines and robots.
There are many values that you can give in the name attribute of the meta tag. These values in the name attribute tell the purpose of the meta tag or what data that specific tag is going to give.
So let’s see some of the important meta tags you need in your custom HTML template for SEO.
Meta description
The meta description is a brief description of what the page is about. Search engines display content inside this tag in search results. Look at the image below.
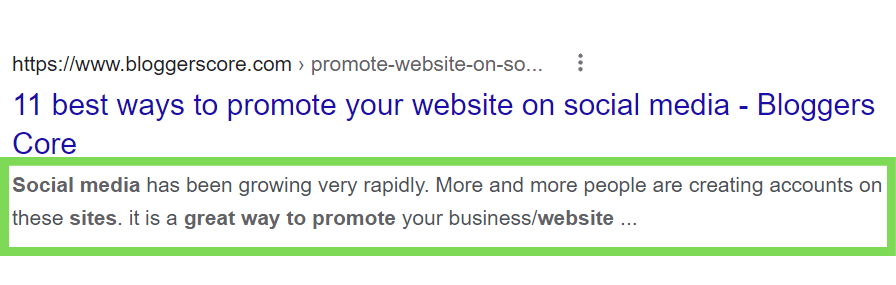
That is where meta description appears. It also appears when someone shares the article on social media. Google doesn’t always take the content inside the meta tag and display it in search. Most of the time they take a relevant part of the content themselves and display it. This is to help users get information from the search result page itself.
Here is what a meta description tag looks like.
In the name attribute of the tag, we specify ‘description‘ so that the search engine bots consider this metadata as the description of the web page. Inside the content attribute, add the description. While adding a description remember to use the keyword of the page at least one time. Adding keywords in the meta description is a best SEO practice. You might have noticed on the search result page that some words in the description are written in bold letters. if the words you have searched appear in the meta description of any web page, they will be shown in bold letters on the search result page.
As I said earlier it is the description of the web page. It helps users and searches engine bots to know what the web page is about. In search results, content inside the meta description is shown. When users read it, they can understand what the web page is about and decide whether to click it or not. They will be able to know if the page will have the information that they are looking for. So make sure you describe the topic thoroughly in the description.
Check out our article on meta description to know more about how to optimize it for better results.
Meta robots
Meta robot tag tells web crawlers or search engine bots whether to rank the web page or not.
For adding this tag, you can specify the ‘robots‘ inside the name attribute of the meta tag. This tells search engines whether to crawl this page or index this page in their search results.
This simple piece of code inside the <head> section will give you the power to restrict search engines or robots from crawling the page.

<meta name="robots" content="noindex, nofollow">
In its content attribute, you can specify ‘noindex‘ if you do not want the web page to appear in the search.
You might think why anyone would want to do this but in some cases like if you are in the development process of the template and are testing it on a server, you might not want search engines to index it now.
There are many other cases where you might want to use this. For example, you don’t want unnecessary pages like comments to appear in search results.
Also, you can specify ‘index‘ inside the content attribute to tell search engines to index this page. By default, the search engine will index your page even if you haven’t specified this in meta.

<meta name = "author" content="Vijay Sivadas">Meta author: Used to define the name of the author of the article or web page. To specify meta author, you just need to add ‘author‘ in the name attribute of a meta tag. In the content attribute of this tag, you can write the name of the author.

<meta name="keywords" content="HTML tags for SEO, SEO, HTML, custom template">Meta keywords: Define the keyword of the page. Though Google doesn’t consider keywords in the meta tag anymore, you can add them if you want. Like we did in the other tags, specify ‘keywords’ in the name attribute and add your focus keyword in the content attribute.
Meta viewport
This tag is added to a web page for responsive web design. Responsive web design makes your website look good on all devices. Your web page is going to be loaded on devices that have different widths. The page’s content will be too small or big on mobile devices and tablets. Meta viewport helps you set the width of content according to the device width. This tag instructs the web browser on how to control the page dimensions and scaling.
Look at the images below to see what this tag does.
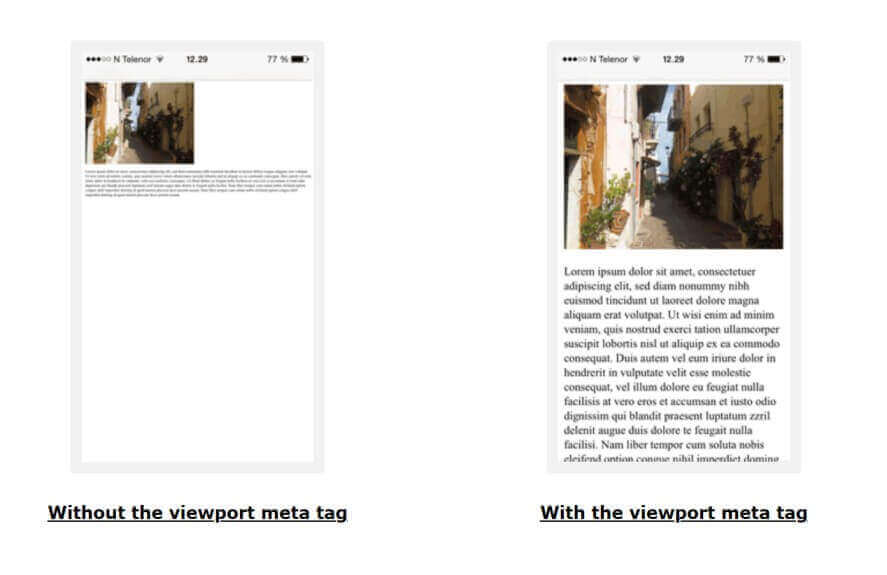
In the image, you can see the difference between the web page which has a meta viewport, and which doesn’t. The page without a viewport has the width of the desktop on the mobile device. So the content is not fitting right and is very small. Now I hope you understood what meta view report does.
To do this, add ‘viewport’ inside the name attribute of the meta tag. Then inside the content attribute, you can specify width. Look at the image below.
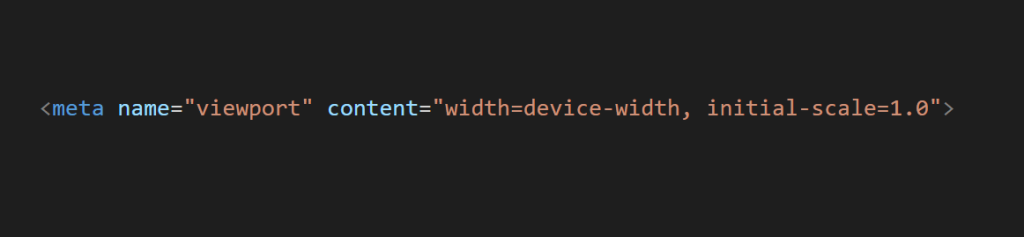
<meta name="viewport" content="width=device-width, initial-scale=1.0"> In the code above you can see ‘width=device-width’. This sets the width of the web page to the width of the device. So the content inside the page will appear to fit according to the device screen width. Also, you can set the initial zoom level that is needed when the page is first loaded. Inside content after the width, you can put a comma and specify how much zoomed the content should appear inside the initial-scale=1.0.
3. Heading tags
Heading tags are used to divide the content into different sub-topics. It makes it easier for users to read. When we write an article on a topic, the topic itself can be divided into different sub-topics. Users will not be able to quickly find the information they are looking for from an article that does not contain any headings.
Most people won’t read an entire article word by word. they will just read the part they want. Heading organize the text for the users so they can read the part of an article they want.
Dividing the content into sub-topics makes the content easy to navigate. You can also use headings to highlight the critical points of the article. Different heading tags in HTML allow doing this.
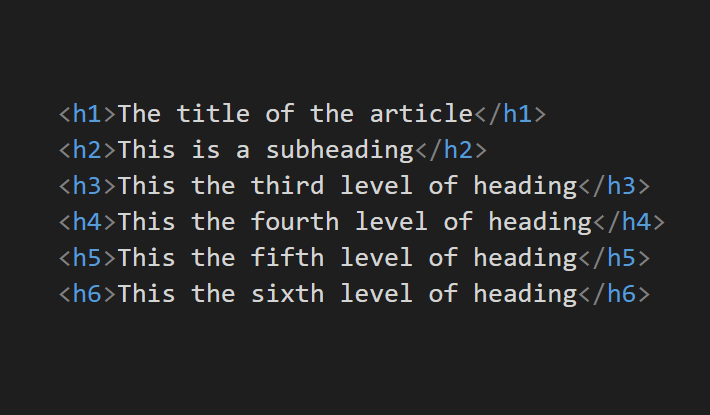
The first heading of your web page which is the title of the article should be in the <h1> tag. h1 is the highest heading level. Then comes the ‘h2 tag’. All main sub-heading are specified inside the h2 tag. The next heading level is the h3 tag. Subtopics within the content inside h2 tags are specified using this tag. There are up to 6 heading levels like this in HTML(h4, h5, and h6).
Bets practice: Add the focus keyword to the subheading in your article.
4. Alt attributes in images
Alt is an attribute in the image tag. The text inside the alt attribute is known as alt text.
Whenever you add an image to your HTML template, make sure you add the alt attribute for that image. The alt attribute is added to provide an alternative text to browsers if the image doesn’t load because of some error.
The text inside the alt attribute will be displayed in the place of that image. It helps not only improve user experience but also helps with image SEO. Images are ranked on google based on their relevance to the query.
Although Google and other popular search engines can identify what an image is about using different machine learning algorithms, specifying what the image is about in the alt attribute is a helping hand to google. Like they can’t identify the image like we do. They might rank your image in the wrong keyword or not rank at all.
For image SEO, alt attributes are used to describe the image, and the focus keyword is also added.


<img src="man-working.png" alt="man working on a laptop">Look at the example above. The HTML code shown is the code of that image. This is how an image is described inside alt text. Search engines use this alt text to identify the content of images and to rank them in relevant keywords.
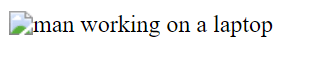
The above image shows how it will appear if the image is not loaded due to some error. This will improve the user experience as it won’t just be a blank space with an image error icon. Alt text will help the user to know the content of the image.
5. <Header> tag
The header tag contains introduction content or navigational link. Information like details about the author, navbar, IMG tags for logos, etc… Navbar is added inside the header tag.

Look at the example above. The introductory content like the main heading and author description etc… is added to the header tag. A good SEO-friendly template should contain a header tag with navigational links and the title of the web page in an H1 tag. Adding this tag to your template makes the code organized and clean. You also need to add the main tag, footer, etc…
6. <main> tag
The next HTML tag that should come after the header tag is the <main> tag. As the name of the tag suggests, the main content of the web page should be inside the main tag. This tag contains all the subheadings, paragraphs, images, videos, etc… of a web page. The content inside the web page should be unique to that web page. It should not contain content like navigation bar, forms, sidebars copyright information, etc… as these are used across the website in many places.
There should not be more than one main tag in a document. Also, the main tag should be a child element of other tags like article, header, footer, or nav.
Using this tag, the content of your web page can be presented in an organized way.
7. <article> tag
The <article> tag specifies independent self-contained content on web page. The content inside this tag should make sense on its own without depending on other elements. Usually, this tag is added inside the main tag. In a blog post, the whole content should be given inside this tag.
You can have multiple articles tagged on a web page. But all content of an article should be inside one article tag. If you add another article tag, it should have a different article. You can have as many article tags as you want on a web page. The key point is that the content inside it should make sense independent of context. You can also add separate article tags with title, description, author name, etc… to list out the latest blog posts in your blog. Look at the example below.
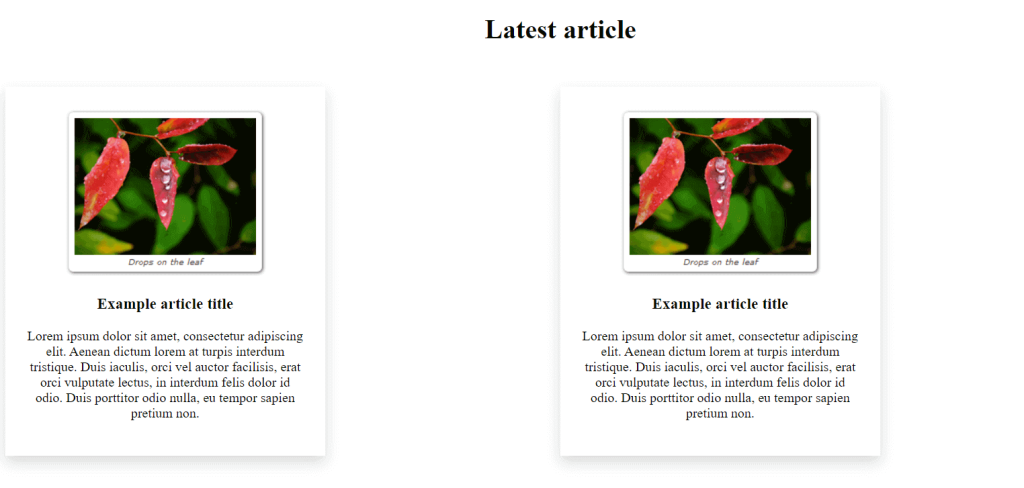
    <article>
        <img src="dropsontheleaf.png">
        <h3>Example article title</h3>
        <p>Lorem ipsum dolor sit amet, consectetur adipiscing elit. Aenean dictum lorem at turpis interdum tristique.
            Duis iaculis, orci vel auctor facilisis, erat orci vulputate lectus, in interdum felis dolor id odio. Duis
            porttitor odio nulla, eu tempor sapien pretium non.</p>
    </article>
When you add this you won’t see any change in the web page because this is an organizational tag. The tag also helps search engines while they are searching through or reading through an article.
<mark>
It specifies the marked or highlighted content on a web page. if you have any sentence or word to highlight on your web page, give it inside the <mark> tag.
8. <footer> tag
A footer tag contains the footer information of a web page. It is added at the end of an HTML document or section. Usually, this tag contains copyright information, navigational links, back to top button, contact information, google map location embed, related articles, logo, etc…
Here is an example of what this tag looks like.

<footer>
  <p>Author: Bloggers Core<br>
  <a href="mailto:[email protected]">[email protected]</a></p>
</footer>
This one is also an organizational tag. You will notice no change in your web page when you add this. The only purpose of this tag is to organize your template.
You can give your contact information in the footer inside the address tag. Although using these tags does not add any style to the web page, it helps search engines to crawl through the web page.
9. Canonical tag
The canonical tag tells the search engine the original URL of specific content. It solves the problem of duplicate content.
For example, if you have two URLs for the same web page the problem of duplicate content occurs. Google can only index one URL for a specific article or web page. Same content accessible from multiple URLs will give you an error message in the search console.
Use a canonical tag on your web page to solve this problem. Here how the HTML code of the canonical tag looks like.
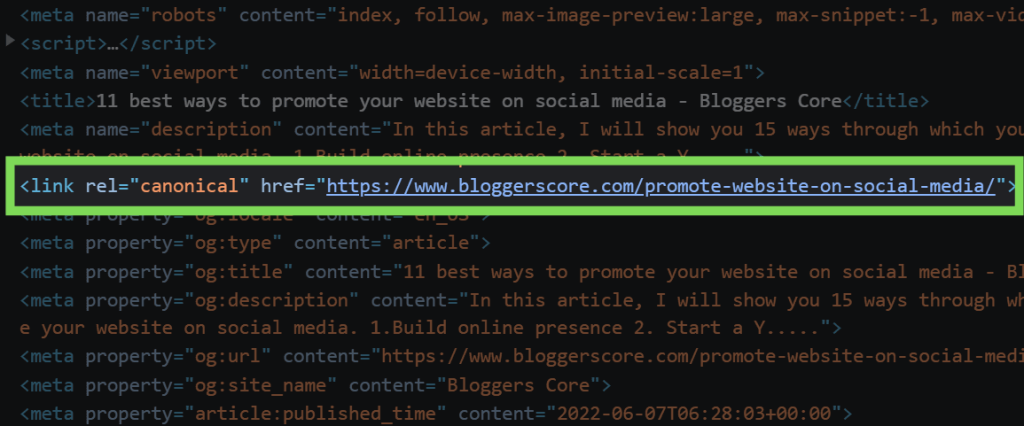
Inside the ‘href’ attribute of the link tag, specify the actual URL you want for the article. Then in the ‘rel’ attribute, specify canonical. Add this piece of code inside the <head> tag of your HTML. Search engines consider the URL inside the canonical tag as the actual or original copy of the content
If more duplicate URLs are found, usually google leaves the page with status unindexed. The canonical tag is one of the important HTML tags for SEO since it helps with indexing the article.
10. Schema markup
A schema is a form of microdata when added to your website appears as a rich result.
You might have seen these types of results on the search result page.
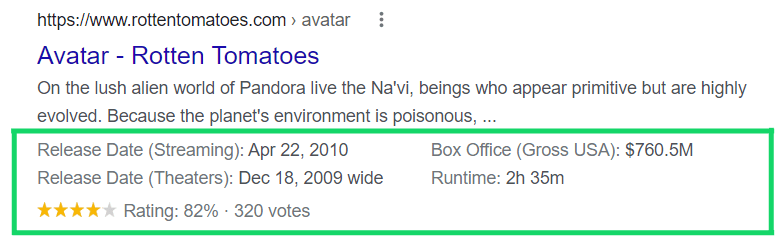
We can display our pages like this using schema.
Schema markup gives information to search engines about what the content of a web page is and how to display it in search results. For example, let’s look at the word ‘bark’. This word can mean a dog’s bark or tree bark.
Though these days search engines can identify these and understand the meaning by context, it is good to specify the particular topic you are talking about in your article. Another example is Avatar. Your article can be about the famous movie Avatar or another word for a profile pic.
You can specify what your article is about in the schema markup. You can define the specific topic about which the article is written and you are looking to rank.
The Schema markup is important for an article since it can help you improve your ranking in search engines. You can make your article appear in the way you want in search results using schema markup. For example, if your article is a review of a laptop, it will have a bigger description with ratings you gave to the laptop and specs, etc…
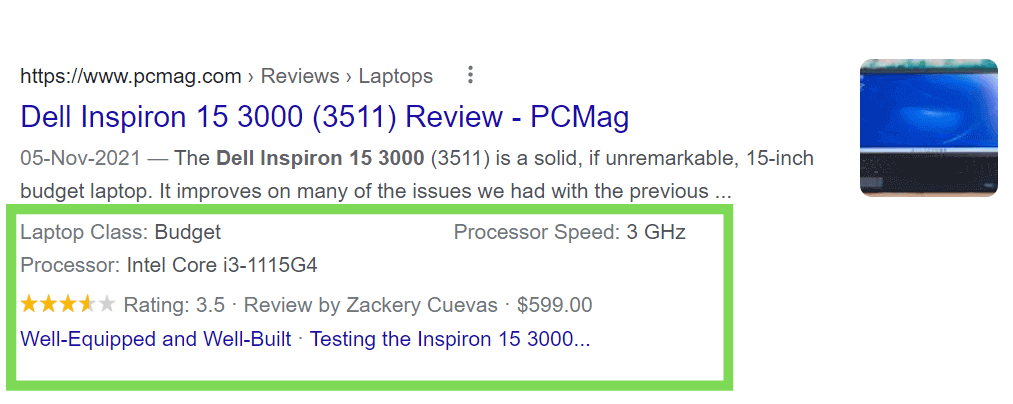
This type of result attracts user attention and also improves your CTR(click-through rate).
In our list of HTML tags for SEO, schema markup is very important as it displays the content in the SERP the way we want.
How to add schema markup to your web page?
Google proivdes a tool to genrate schema markups. So you don’t have to do it manually. Go to Google Structured Data Markup Helper.
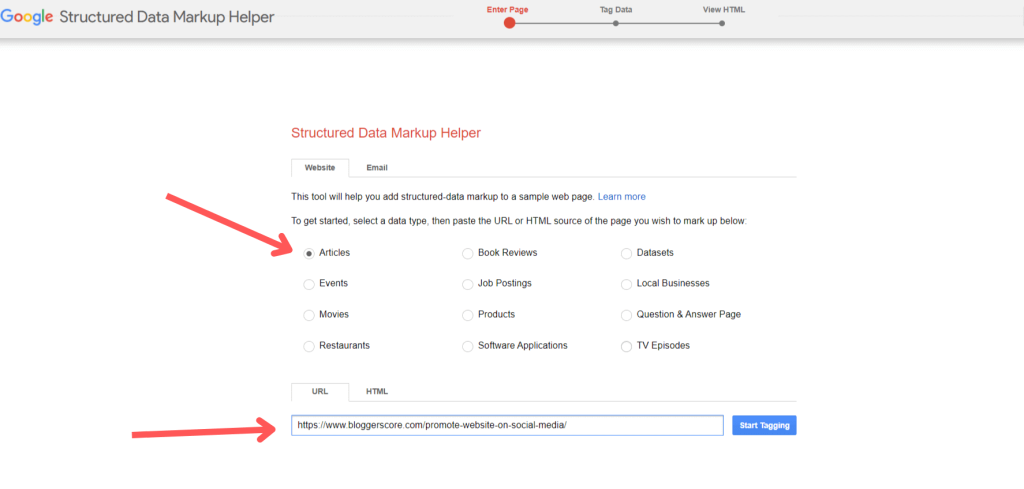
Then select a data type from the option shown on the page. If it is an article select the article or if it is a book review select that. Then past the URL to that web page or article on your website. Click start tagging.
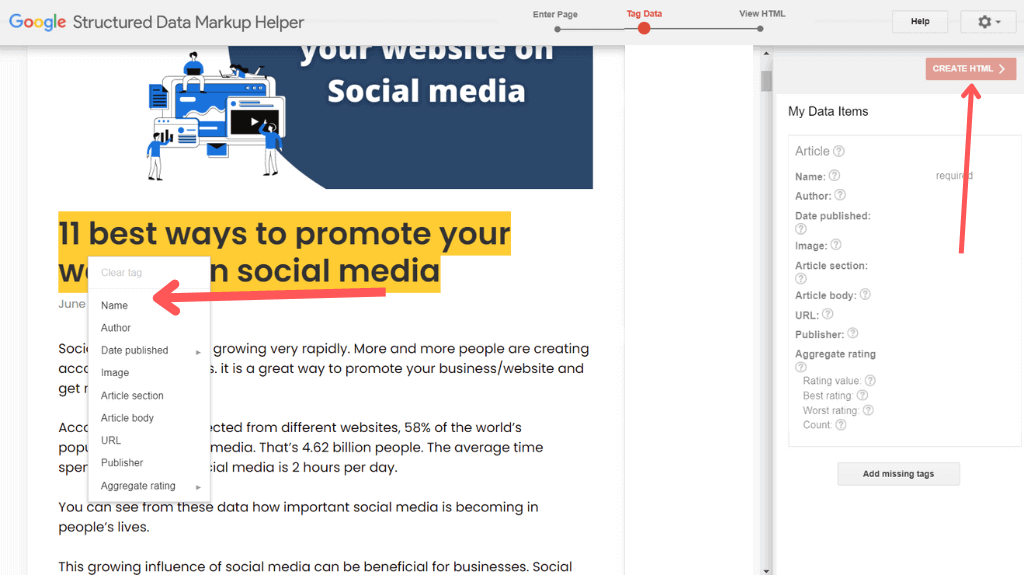
Then you will see a page where you can tag each piece of data from your article. The schema markup will contain data like author name, name of the article, published date, article body, etc… In this tool, you can enter these details by selecting that on your page and left-click. For example, if you want to enter the name of the article then select the title and left-click. A drop-down list will appear and you can select ‘name’ from the list. Select all the elements shown in the sidebar in a similar way.
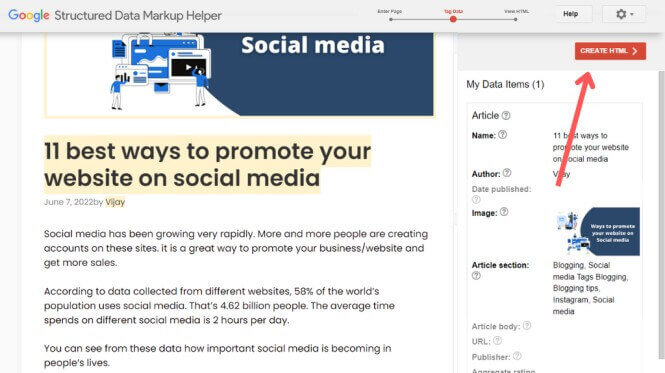
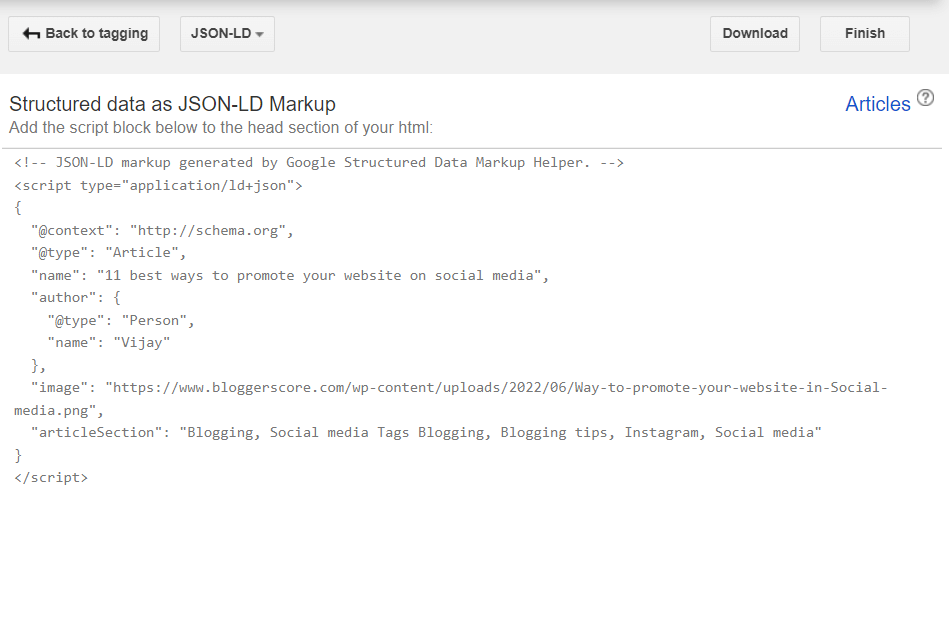
After selecting all the elements like article, body, publisher’s name, etc… click on ‘CREATE HTML’. This will generate a schema markup for the web page in JSON format. Download or copy the code and paste it into the head section of your HTML document.
So that is how you can add schema markup to your web page.
Best practices
- Place all the content of the page inside one article tag and it should come under the main tag.
All these tags (main, article, header, footer) does not add any design to the document. These are used to keep the code of the template clean and organized. - Inside the body tag, first comes the header tag. It should contain the navbar, logo, etc…
Then after that, you need to add a <main> tag. Inside <main> tag, add an article tag and inside it add a header tag to specify information like author name, h1 heading of the article, share buttons, etc…
Include all the content in the article tag. Then specify the footer tag. Inside it, add the navigational links, copyright info, back-to-top button, logo, etc… Follow this structure while creating an HTML template.
Conclusion
These are the must-use 10 HTML tags for SEO in a template. Get your web page a boost in rankings using these tags. In Modern CMS(content management systems) like WordPress, these tags are automatically added and you also have options to customize these in the way you want.
When you create your own custom HTML template, you must add these tags yourself. You won’t remember all these tags, so this list of HTML tags for SEO will be helpful to you.
Subscribe to our email newsletter for more content like this.
Latest post